| 1. | Printer must be connected via USB cable to local PC
|
| 2. | Printer must support and have driver installed for PCL 5, 5e or 6
|
| 1. | Install printer with the appropriate PCL drivers |
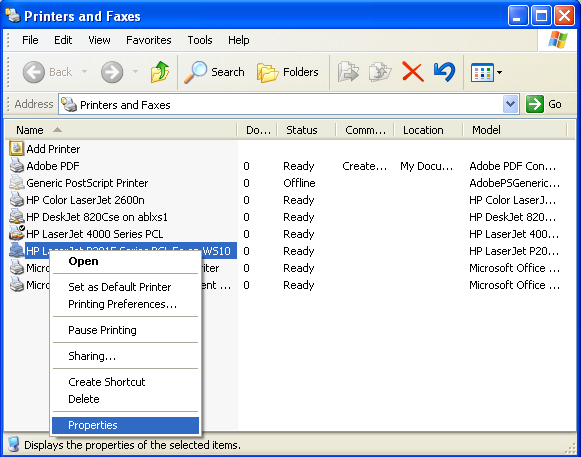
| 2. | Once printer has been installed, go to the Windows Start Menu and select "Printers and Faxes"
|
| 3. | Find the USB printer, right-click and select "Properties"
|
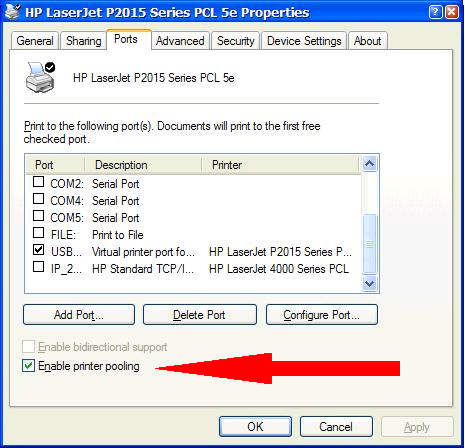
| 4. | Go to the "Ports" tab and check the "Enable printer pooling" box
|
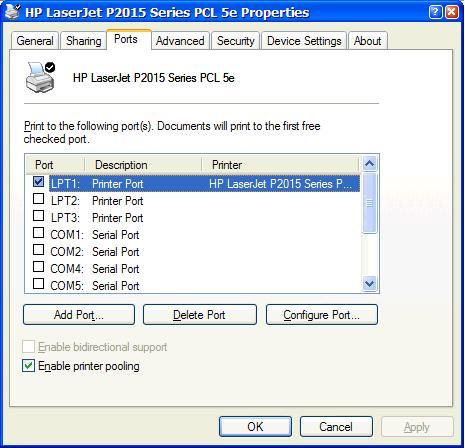
| 5. | Then check the LPT1 printer port. Ports LPT2 or 3 may also be used.
|
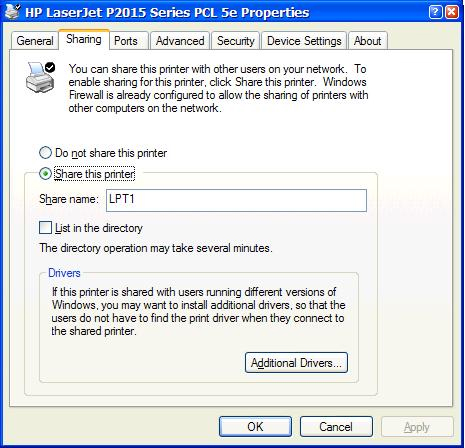
| 6. | Go to the "Sharing" tab and select "Share this printer"
|
| 7. | Enter the Share Name as "LPT1" (or whichever LPT port you added in the printer pooling steps above)
|
| 8. | Click "Apply" and "OK" to exit the printer properties window
|
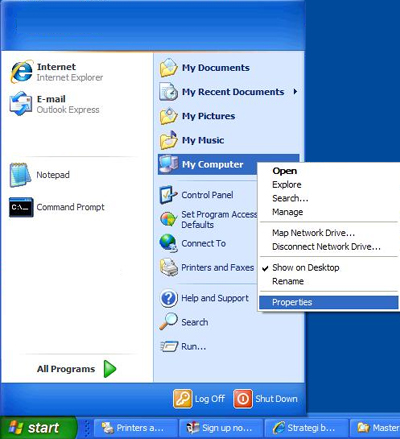
| 9. | Go to the Windows Start menu, right-click on My Computer and select "Properties"
|
| 10. | Go to the "Computer Name" tab
|
| 11. | Note the Full computer name. In the example below, the computer name is actually the
Full computer name minus the Domain. So "WS10" is the computer name here

|
| 12. | Now launch the signed applet and send yourself a HPT print
|
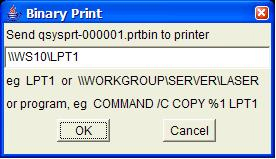
| 13. | In the Available Files window, click "Retrieve" on the print file. The Binary Printer window will display
|
| 14. | Using the Computer Name and the LPT port you assigned to the printer, enter the path in the Binary Print window as \\computer_name\LPT_port
|
| 15. | Click OK and the print should go to the designated printer. If it doesn't, verify setup steps above to ensure no steps
were missed.
|
